Managing a Skin
You can upload a default skin for all the portals in the global administrator view or for a specific team or reseller portal in the view for that portal.
To upload a skin to the portal:
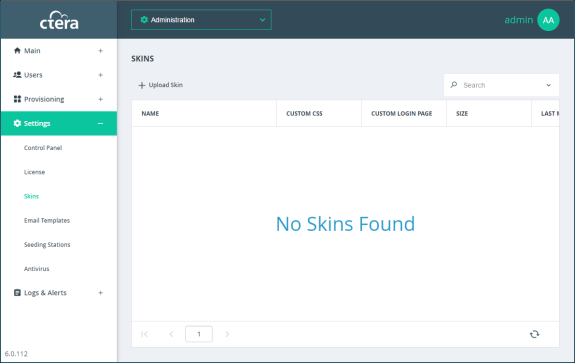
1 For all portals, in the global administration view or for a specific virtual portal, in the view for the virtual portal, select Settings > Skins in the navigation pane.
The SKINS page opens, displaying the available skins.

2 Click Upload Skin to upload the new skin.
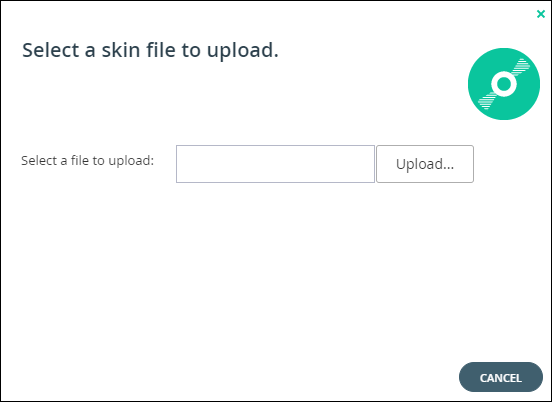
The Select a skin file to upload window is displayed.

3 Click Upload and browse to the skin received from CTERA support.
4 Select the skin and click Open.
5 Click FINISH.
Note: You can also download a skin from the portal to make changes. CTERA recommends only doing this in coordination with CTERA support.
To make a skin the default skin:
1 For all portals, in the global administration view or for a specific virtual portal, in the view for the virtual portal, select Settings > Skins in the navigation pane.
The SKINS page opens, displaying all the available skins.
2 Select the skin to use as the default and click Set Default.

3 Refresh the portal to apply the customizations.
To delete a skin
1 For all portals, in the global administration view or for a specific virtual portal, in the view for the virtual portal, select Settings > Skins in the navigation pane.
The SKINS page opens, displaying all the available skins.
2 Select the skin to delete and click Delete.
The skin is deleted.