Enabling NEXT3 Snapshots on a Volume
If the volume you want to configure for snapshots is not configured as NEXT3 snapshot enabled, you can change the volume's details.
1 In the Configuration tab, select Storage > Volumes.
2 Click on the desired volume to open it for editing.
The Specify Volume Details window is displayed.
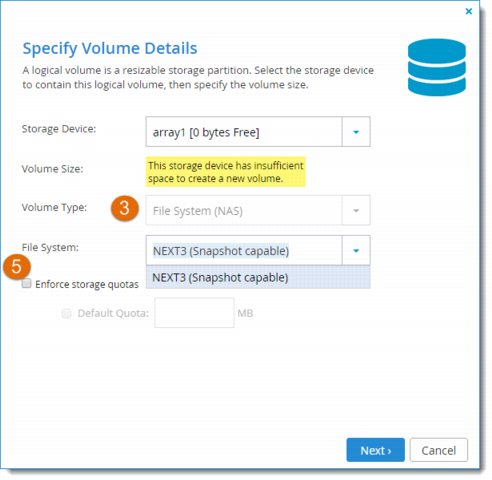
3 Make sure that File System (NAS) is selected as the volume type, and that NEXT3 (Snapshot capable) is selected as the file system:
Are the next step (5) something that doesn't belong in this dialog box? Why would storage quota be enforced on a snapshot?
4 Optionally check Enforce storage quotas to limit the amount of storage space allocated to each volume user, then check Default Quota and set a default storage space quota in MB for volume users.
If this option is not enabled, an unlimited amount of space is allocated to each user, by default.
5 Click Next, and then assign a name to the volume.
6 Click Finish.
The volume will be installed with the NEXT3 file system, and snapshots will automatically be taken of the volume before each cloud backup or outgoing synchronization rule is performed.
Note: NEXT3 snapshots are only supported for volumes 64GB or larger.