Downloading and Installing CTERA Agent
To download and install CTERA agent:
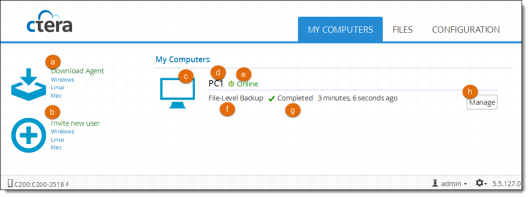
1 Click the My Computers tab.
The My Computers page is displayed.
2 Under Download Agent, click Windows.
The CTERA Agent installer is downloaded to your computer.
3 Double-click the installer file.
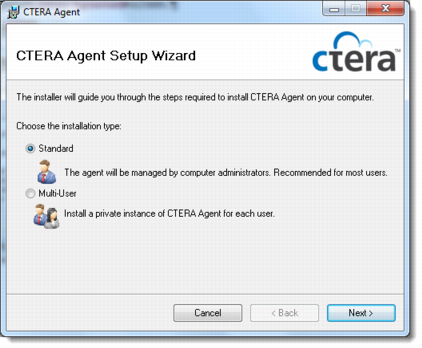
The CTERA Agent Setup Wizard is displayed.
4 Select one of the following:
• Standard. The agent configuration will be shared by all users of the computer. Only users who have the “Backup Operator” permission can configure the agent and perform backup and restore operations.
• Multi-User. The agent is installed for each user separately the first time that the user logs in to the computer. Each user has a completely independent and separate configuration and can even connect to a different device or portal than the other users. Each user has permission to manage their own agent and can perform backup and restore operations for any files for which they have read/write permissions. In other words, administrators and backup operators can back up and restore any and all files on the PC, whereas other types of users cannot. Each user’s agent remains connected to the cloud and continues to perform its scheduled backups and synchronizations in the background, even when the user is not logged in.
Note: When the CTERA Agent is in both multi-user mode and Cloud Gateway mode, only administrators and backup operators can connect their agent to a CTERA Cloud Gateway.
5 Click Next.
The Select Installation Folder screen is displayed.
6 Edit the folder path, if desired, and then click Next.
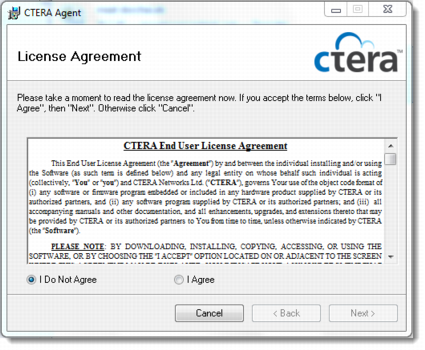
The License Agreement screen is displayed.
7 Choose I Agree.
8 Click Next.
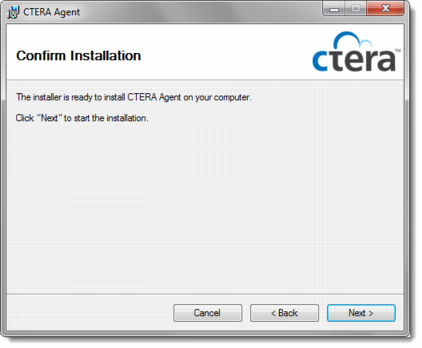
The Confirm Installation screen is displayed.
9 Click Next.
The Installing CTERA Agent screen is displayed with a progress bar, and the CTERA Agent is installed on your computer.
The Installation Complete screen is displayed.
10 Click Close.