Allocating Disk Quotas to Users
If disk quotas are enabled for a volume, you can limit the amount of storage space allocated to each volume user.
For information on enabling disk quotas, see
Creating Volumes.
Note: Administrators are automatically allocated unlimited storage space.
1 Enable quotas on the volume from which you want to assign a quota:
a In the Configuration tab of the Cloud Storage Gateway web interface, go to Storage > Volumes and select the relevant volume.
b Click Edit.
c In the Specify Volume Details screen, check Enforce storage quotas. If you want to set a default quota, check Default Quota and then enter the quota size in MB. This means all non-administrative users will now be allocated a quota of this size on this volume.
d Click Next, Next, and then Finish to complete the wizard.
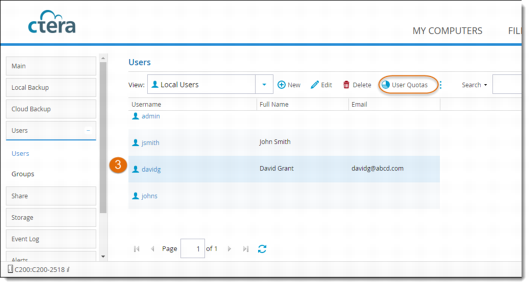
2 In the Configuration tab, select Users > Users.
3 Select the user for whom you are allocating the quota, and then click User Quotas.
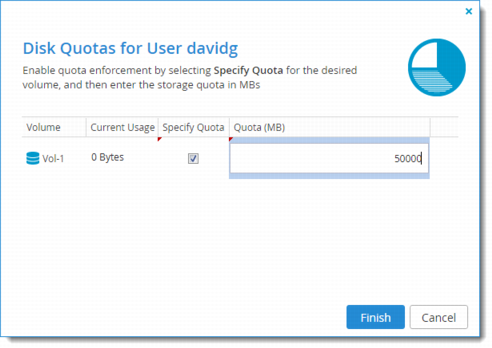
The Disk Quotas screen opens, displaying the amount of space consumed by the user for each disk, along with the user's disk quota.
4 For each volume in which you want to define the user's quota, select Specify Quota, and then enter the desired quota in the relevant field.
For each volume in which you want to revert to the default quota, clear the Specify Quota check box.
5 Click Finish.