Managing User Groups
The gateway includes two built-in user groups: Administrators and Read Only Administrators. You can create additional user groups to meet your organization's requirements. It is possible to add each user to more than one group.
Note: Gateway administrators can create local groups with nested AD groups. Nesting AD groups within local groups is useful when addressing frequent changes in branch user hierarchies.
To add or edit a user group:
1 In the CONFIGURATION tab, select Users > Groups in the navigation pane.
The Groups page is displayed.
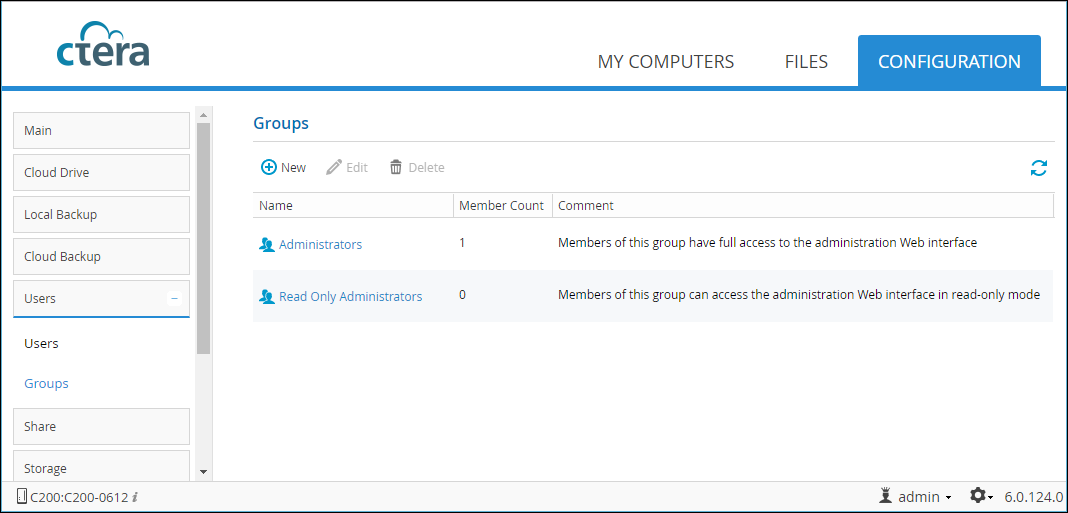
2 To add a group, click New.
Or,
To edit a group, either click the group name or select the group row and click Edit.
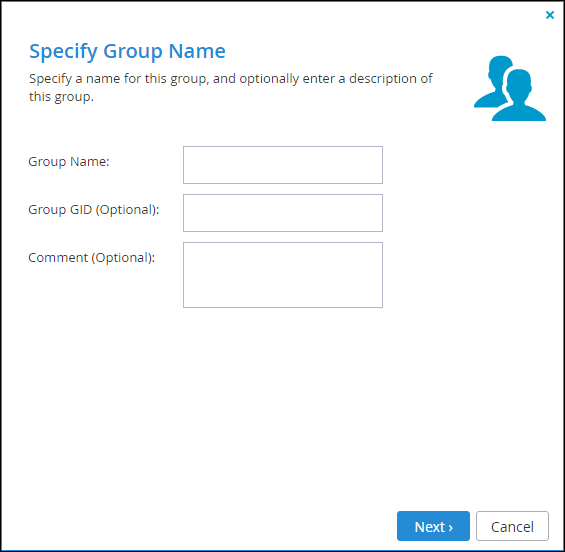
The Specify Group Name window is displayed. If you are editing an existing group, the window is displayed with the group details.
Note: You cannot edit the Administrators and Read Only Administrators group names or descriptions.
3 Specify the group name and optionally, other details.
4 Click Next and select the group members.
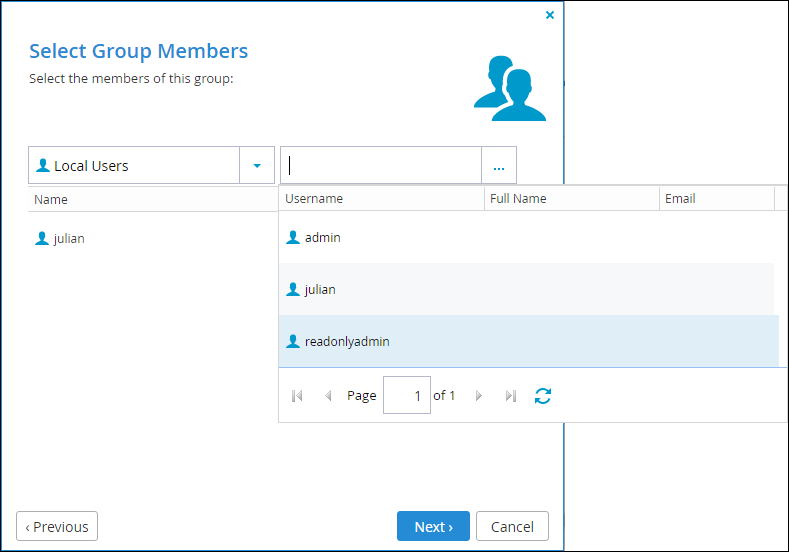
a Select the group whose member you want to include.
b Either start to enter a user name is the Quick Search text box or, click  and select the user from the list.
and select the user from the list.5 When you are done adding users, click Next and then Finish.