Handling Hard Disk Problems
If the hard disks are not being reported correctly, for example they are showing as inactive or not showing at all, use the following procedure to remedy the problem.
To resolve a CTERA Edge Filer disk problem:
1 Power down the gateway.
2 Remove every hard drive in one of the following ways:
3 After all the drives have been removed, power on the appliance.
4 Wait a few minutes. If the problems were disk problems, you should then be able to access the gateway user interface. If the problems were not disk related, you will still have problems accessing the gateway user interface. If the problem is with the gateway, contact CTERA support.
5 In the gateway user interface make sure that both Cloud Backup and Cloud Sync are suspended.
a In the CONFIGURATION tab, select Cloud Backup > Control Panel.
b Click Suspend to suspend back ups.
c In the CONFIGURATION tab, select Cloud Drive > Cloud Drive.
d Click Suspend to suspend syncing files.
6 In the CONFIGURATION tab, select Main > Dashboard.
7 Reconnect the first hard drive in to SATA1, the drive in the top right that was the first drive that was disconnected.
8 Wait for user interface to show drive as ready.
9 Insert the next drive into SATA2 and again wait for user interface to show drive as ready.
10 Repeat step 9 for all the remaining drives.
11 Wait for the array to rebuild.
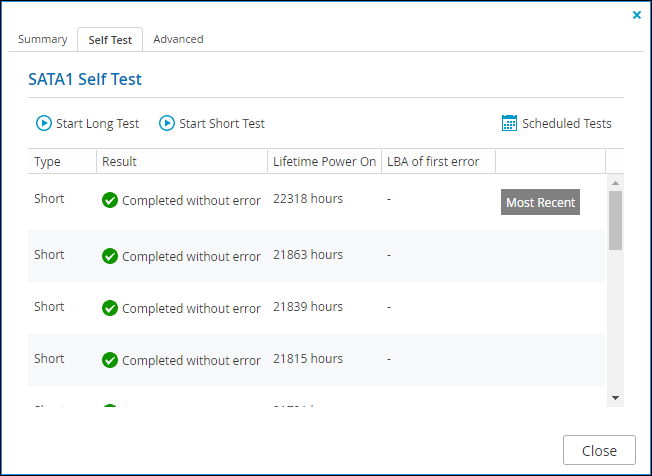
12 Run S.M.A.R.T. (Self-Monitoring, Analysis, and Reporting Technology) scans on the drives.
a In the CONFIGURATION pane, select Main > Dashboard.
b In the Hard Disk Drives area, click the drive you want to test.
The Hard Drive Status window is displayed for the selected drive.
c Select the Self Test tab.
d Click the type of test you want to run on the drive:
Results are displayed in the Self Test tab.
If this procedure does not resolve the problem, perform a volume repair to check the disk for errors:
1 In the CONFIGURATION tab, select Storage > Volumes.
2 Select the volume and click Repair.
The Volume Repair Utility wizard is displayed.
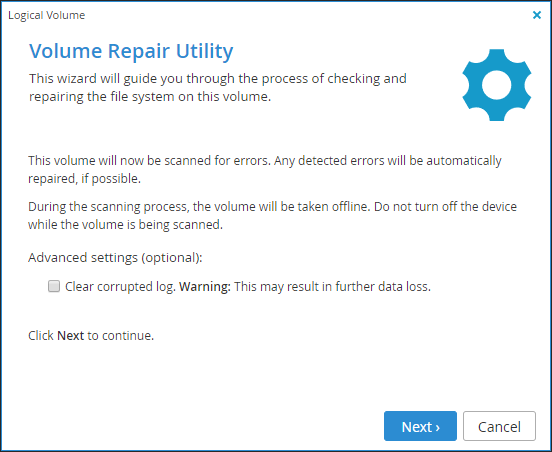
Warning: During the scanning process, the volume is taken off line. Do not turn off the gateway while the volume is being scanned.
3 Optionally, configure the settings for the repair operation.
Delete all snapshots – Check this box to delete all snapshots for this volume. This option is only available when repairing a NEXT3 volume.
Delete corrupt files – Check this box to delete corrupt files. If repairing a NEXT3 volume, the Delete all snapshots check box is automatically selected.
4 Click Next.
While the files system on the volume is scanned for errors, the Scanning & Repairing screen displays a progress bar.
When the process is complete, the Repair Complete screen displays a list of files system errors that were corrected.
5 Click Finish.