CTERA Portal Zones
CTERA Portal provides enterprises with a global file system, integrating branch office and cloud file services under a global namespace. The global namespace is the content of all folders and subfolders that are in a team portal.
CTERA Zones enables the global file system to be divided so that only the relevant subset of the namespace is accessible by each edge location. This means that each edge location is separated from every other edge location in the enterprise, enabling privacy and security between locations. Also, since each edge location only has access to the folders and files that they require for their business, managing the global file system becomes easier for the global administrator.
Zones are defined at the team portal level for edge filers connected to the portal. Once defined, the edge filer has no access to any folder in the portal that is not defined as belonging to that zone. When content is required by more than one location, the relevant folders can belong to more than one zone.
Any edge filer that is connected to a portal with zones defined for it, is automatically associated with the default zone. An edge filer can be associated with more than one zone. In this case the edge filer will sync folders from every zone it is associated with. More than one zone can be associated with a single edge filer. All the folders defined for all the zones are synced with the edge filer. Also, more than one edge filer can be associated with a zone.
Defining a Zone
Zones are defined per team portal after they are enabled for every team portal in the CTERA Portal.
Some countries have strict rules about where data is stored. In cases like this, a zone can be defined for that country so that all the data from the global namespace that has to be restricted to the country is accessible via edge filers in the country.
Different departments in a company do not need to be overloaded with files from other departments that they never need. With an edge filer used the content required by each department and zones defined for each department edge filer, users have access to their data and are not overloaded with unwanted content from other departments. In addition, there is the extra security consideration that users cannot access sensitive content belonging to another department, such as human resources. Even if all the edge location content is accessed from a single edge filer, by creating multiple zones associated with this edge filer, you can separate the content on the edge filer in to logical units.
In this section:
All zone actions are logged in the audit log.
Implementing Zones in a CTERA Portal
To implement Zones on your portal, contact CTERA support.
Warning: Once zones are set, you cannot change back to not using zones.
Each team portal can define the zones for that specific team portal. The following zones are generated automatically when zones are enabled, for each team portal, and for any new team portal:
All Folders – This is the default zone and includes all the folders in all the edge filers associated with the portal. This is equivalent to having no zones, as the whole global namespace is included in the zone. You can use this zone as a starting point by editing the zone to include only those folders that you want in the zone.
No Folders – A zone that doesn’t have any edge filers associated with it. You can use this zone as a starting point by editing the zone to include folders that you want in the zone.
Viewing Zones for a Team Portal
1 Sign in to the portal as an administrator with read/write permissions.
2 In the administration view for the portal, select Folders > Zones in the navigation pane.
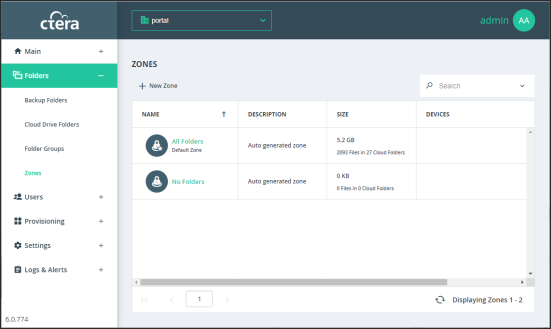
The ZONES page opens, displaying all the zones.
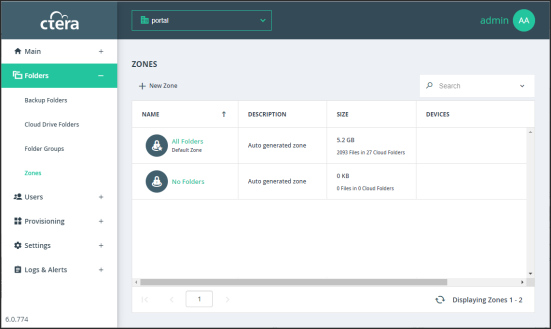
NAME – The zone’s name.
DESCRIPTION – An optional description of the zone.
SIZE – The current size of the cloud folder in the zone. The total number of files and folders is displayed under the size.
DEVICES – The list of edge filers that are included in the zone.
Creating or Editing Zones
You can create a zone or edit an existing zone.
To create or edit a zone:
1 Sign in to the portal as an administrator with read/write permissions.
2 In the administration view for the portal, select Folders > Zones in the navigation pane.
The ZONES page opens, displaying all the zones.
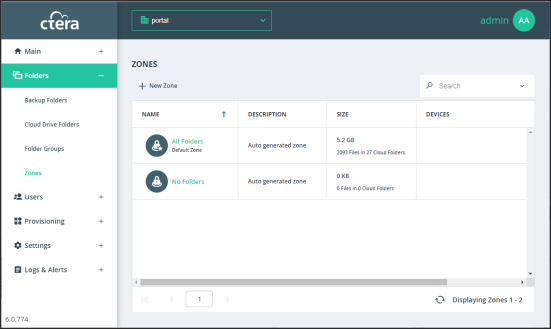
3 Either,
The New Zone window is displayed.

Or,
The zone window is displayed with the zone name as the window title.
4 Complete the fields in the GENERAL tab:
Name – A name for the zone. The name must be unique. The name can contain alpha, numeric and space characters. You must enter a name to specify selected folders or edge filers.
Description – A description for the zone.
Policy will include – The folder policy to apply to the zone.
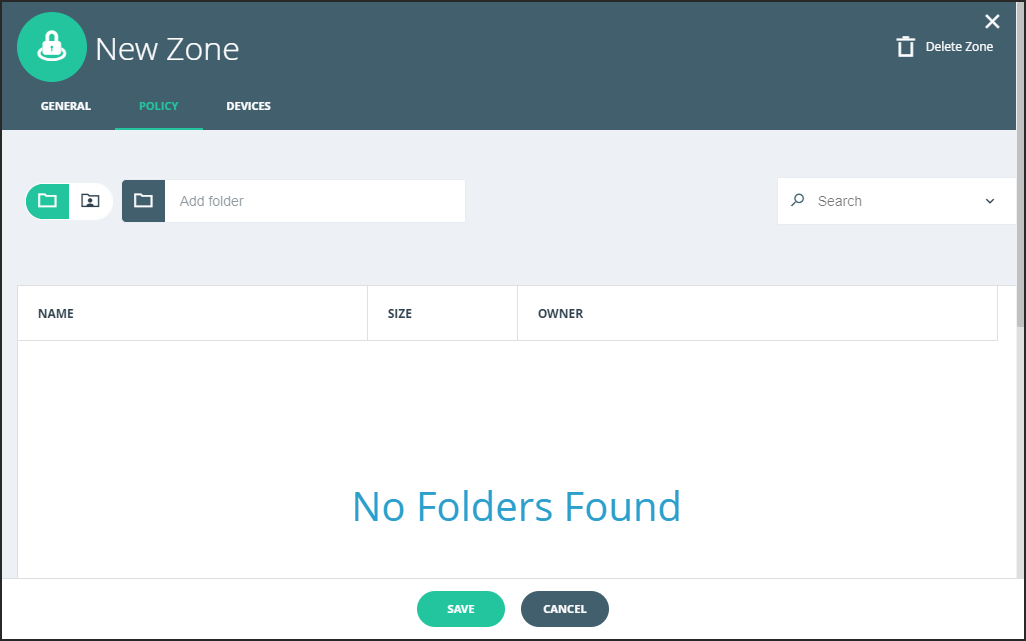
Select cloud folders or user folders and then start typing the name of a folder. The list of folders that match what you type is displayed, enabling you to select the folders to add to the zone.
Folders are identified in the user interface by the OWNER column in the POLICY tab.
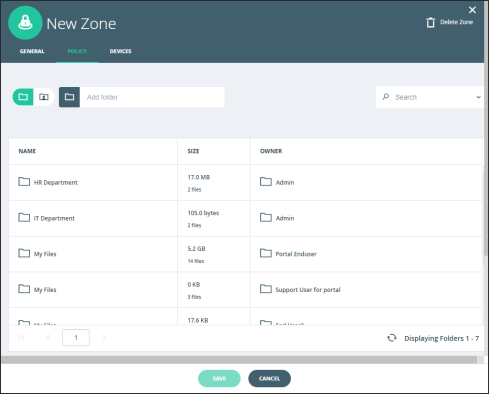
Note: Adding a cloud folder automatically includes all the cloud folder subfolders. Any folder added to the cloud folder at a later date is also included automatically in the zone.
5 In the DEVICES tab, specify edge filers that can see the folders in the zone. When edge filers are specified, only those edge filers have access to the folder in the zone. When no edge filers are selected, every edge filer has access to the folders in the zone.
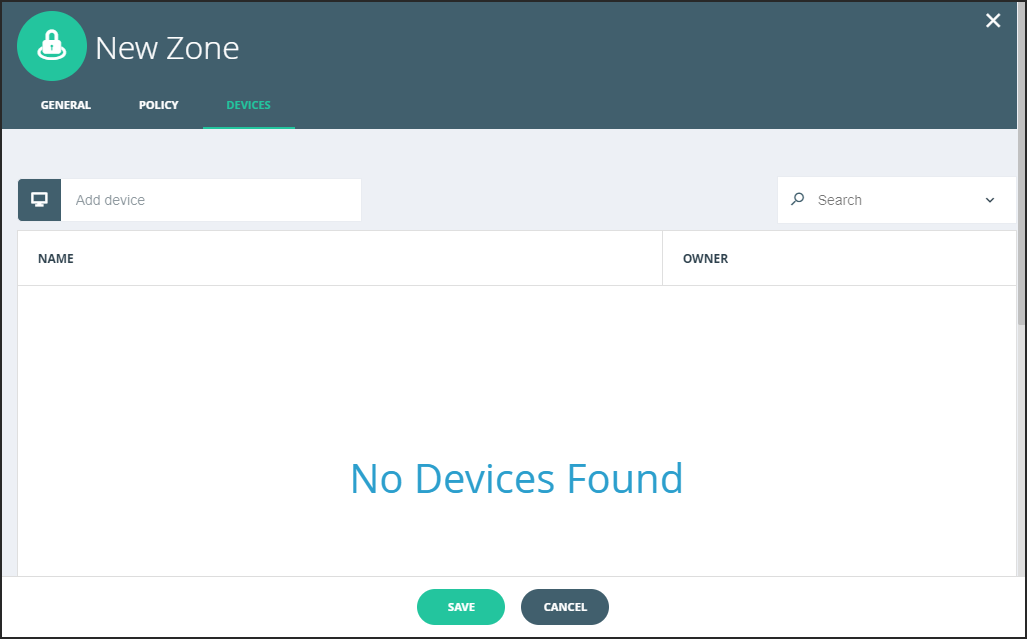
Start typing the name of an edge filer. The list of edge filers that match what you type is displayed, enabling you to select the edge filers to add to the zone.
Note: An edge filer that is already specified for a zone can still be specified for another zone.
6 Click SAVE.
The zone is created or updated.
Removing a Folder from a Zone
To remove a folder from a zone:
1 Sign in to the portal as an administrator with read/write permissions.
2 In the administration view for the portal, select Folders > Zones in the navigation pane.
The ZONES page opens, displaying all the zones.
3 Click the zone with the folders to remove.
4 Click the POLICY tab.
5 Select the folder’s row.
6 Click Remove from zone
A confirmation window is displayed warning that the folder will be deleted from the edge filers using the zone. Click that you understand to delete the folder from the zone.
The selected folder is removed from the zone.
Removing an Edge Filer from a Zone
To remove an edge filer from a zone:
1 Sign in to the portal as an administrator with read/write permissions.
2 In the administration view for the portal, select Folders > Zones in the navigation pane.
The ZONES page opens, displaying all the zones.
3 Click the zone with the edge filers to remove.
4 Click the DEVICES tab.
5 Select the edge filer’s row.
6 Click Remove from zone
A confirmation window is displayed warning that all the content of the zone will be deleted from the edge filer. Click that you understand to delete the edge filer from the zone.
The selected edge filer is removed from the zone. If an edge filer is removed from all the zones, it is automatically added to the default zone.
Setting or Removing the Default Zone
The default zone is automatically assigned to all new team portals. The default portal cannot be deleted.
To set a zone as the default:
1 Sign in to the portal as an administrator with read/write permissions.
2 In the administration view for the portal, select Folders > Zones in the navigation pane.
The ZONES page opens, displaying all the zones.
3 Select the desired zone's row.
4 Click Set Default.
The selected zone becomes the default zone. Default Zone is displayed under the zone name.
To remove a zone from being the default:
Note: You must have a default zone. To remove the default setting from a zone requires specifying another zone as the default zone.
1 Sign in to the portal as an administrator with read/write permissions.
2 In the administration view for the portal, select Folders > Zones in the navigation pane.
The ZONES page opens, displaying all the zones.
3 Select the zone’s row that will become the default zone instead of the current default zone.
4 Click Set Default.
The selected zone replaces the old default zone as the default.
Deleting a Zone
Only a zone that is not the default zone can be deleted. If the zone is the default zone, first make another zone the default zone.
To delete a zone:
1 Sign in to the portal as an administrator with read/write permissions.
2 In the administration view for the portal, select Folders > Zones in the navigation pane.
The ZONES page opens, displaying all the zones.
3 Select the zone's row.
4 Click Delete.
A confirmation window is displayed.
5 Click DELETE to confirm.
The zone is deleted.