Configuring Clientless Backup
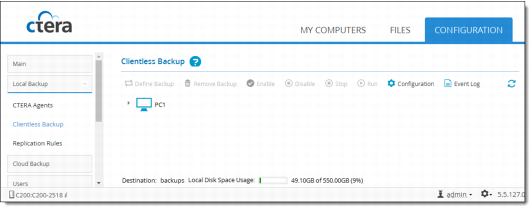
1 In the Configuration tab, select Local Backup > Clientless Backup.
The Clientless Backup page opens, displaying all computers in the network neighborhood.
2 Click Configuration.
The Clientless Backup wizard opens, displaying the Configure Clientless Backup window.
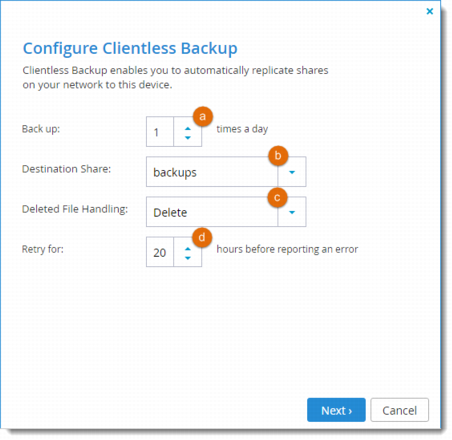
a Use the arrows to specify how many times a day the remote folders should be backed up.
b Select the local cloud storage gateway network share with which the remote folders should be backed up.
Clientless Backup will automatically create subdirectories under this network share for each backed up folder.
c Specify how deleted files should be handled, by selecting one of the following:
• Keep Deleted Files. Files deleted in the source folder should be kept and not deleted in the destination folder.
For example, if you chose to back up a local folder to a remote server, and one of the files in the folder is deleted locally, the file will not be deleted on the remote server.
• Move to Trash Can. Files deleted in the source folder should be moved from the destination folder to the Trash Can folder. (The trash can is a folder called ".Trash".)
• Delete (default). Files deleted in the source folder should be permanently deleted from the destination folder.
d Use the arrows to select the number of hours after Clientless Backup has failed, that the cloud storage gateway should continue to retry Clientless Backup. The cloud storage gateway will only log an error once the specified number of hours has elapsed. (The default is 20 hours.)
3 Click Next and then click Finish.