Installing the Virtual Gateway in a vSphere Environment
Contact CTERA Networks, and request the latest ESXi gateway OVA file.
To install the Virtual Gateway in a vSphere environment:
1 Select the ESXi host under which you want to run the CTERA Portal and click File > Deploy OVF Template.
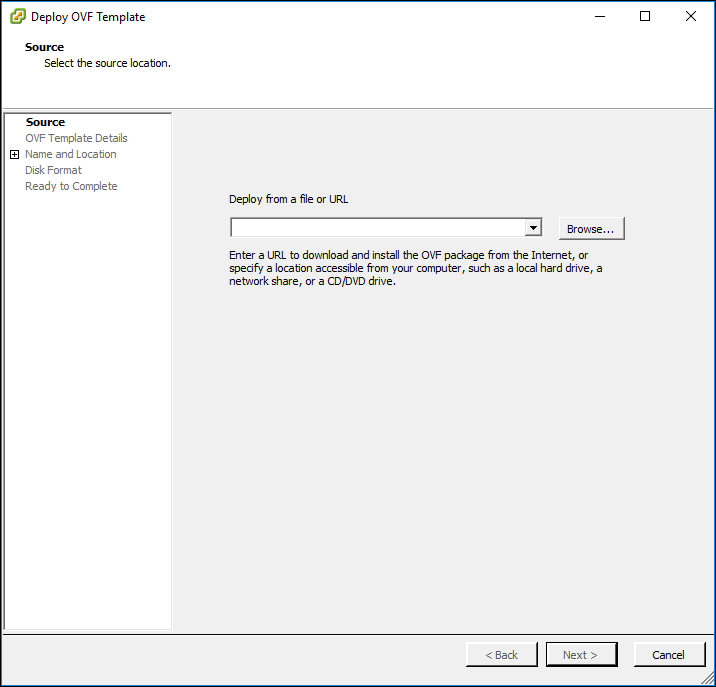
The Deploy OVF Template wizard opens, displaying the Source dialog box.
2 Click Browse, and browse to the CTERA Virtual Gateway OVA file.
3 Click Next.
4 Enter a name for the Virtual Gateway and then click Next.
5 Complete the wizard by specifying the following information, as required for your configuration:
e The resource pool in which you want to deploy the Virtual Gateway.
f The format in which you want to store the virtual disks. The Virtual Gateway works with each of the formats listed.
g The network that the Virtual Gateway should use.
6 Click Finish to complete the Virtual Gateway installation.
Note: Do not power up the Virtual Gateway until instructed to do so during configuration.
Configuring the Virtual Gateway
Note: Do not power up the CTERA Virtual Gateway until instructed to do so.
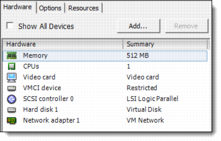
1 Right-click the Virtual Gateway and select Edit Settings.
The configuration is displayed for the hard disk the template created for the Virtual Gateway OS.
2 Perform the following steps to add a second hard disk:
a Click Add and then select Hard Disk.
b Click Next.
c Select Create a new virtual disk and then click Next.
d Specify the virtual disk size and provisioning policy:
• In the Disk Size fields, specify a minimum of 160GB.
• In the Disk Provisioning area, select Thick Provision Lazy Zeroed.
• In the Location area, select Store with the virtual machine.
e Click Next.
f In the Virtual Device Node field, select one of the free SCSI connectors.
If desired, you can use the default setting, SCSI (0:0).
g Click Next and then click Finish.
3 Power up the Virtual Gateway.
4 (Optional) To manually configure the Virtual Gateway's IP address, perform the following steps:
a Switch to the Console tab.
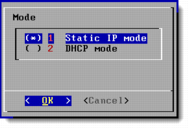
b Using the arrow keys, select Network settings and then press Enter.
c Scroll to the desired mode using the arrow keys and then press Enter.
d Complete the configuration based on the mode you selected.
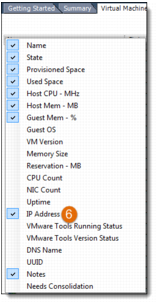
5 In the left pane of the VSphere client, select the repository object and then select the Virtual Machines tab.
6 If the CTERA Virtual Appliance's IP address is not displayed, right-click the menu bar and make sure that IP Address is selected in the list.
7 Open a web browser and enter the CTERA Virtual Gateway's IP address.