Navigating the Gateway User Interface
The gateway user interface consists of the following elements:
MY COMPUTERS tab – For managing connected CTERA Agents. Use this tab to view your own agent and all agents connected to the gateway.
FILES tab – Enables you to view and manage the files and folders on the gateway.
CONFIGURATION tab – Enables you to perform configuration tasks.
Log out – log out of the gateway.
Change Password – Change the password to access the gateway with the current user. The password must be at least eight characters and must include at least a letter, digit and special character, such as ~, @, #, $ , %, ^, & , (.
Help – Open the online help for the gateway in a new tab.
MY COMPUTERS Tab
Use the MY COMPUTERS tab to manage CTERA Agents. You can manage all agents with a connection to the gateway.
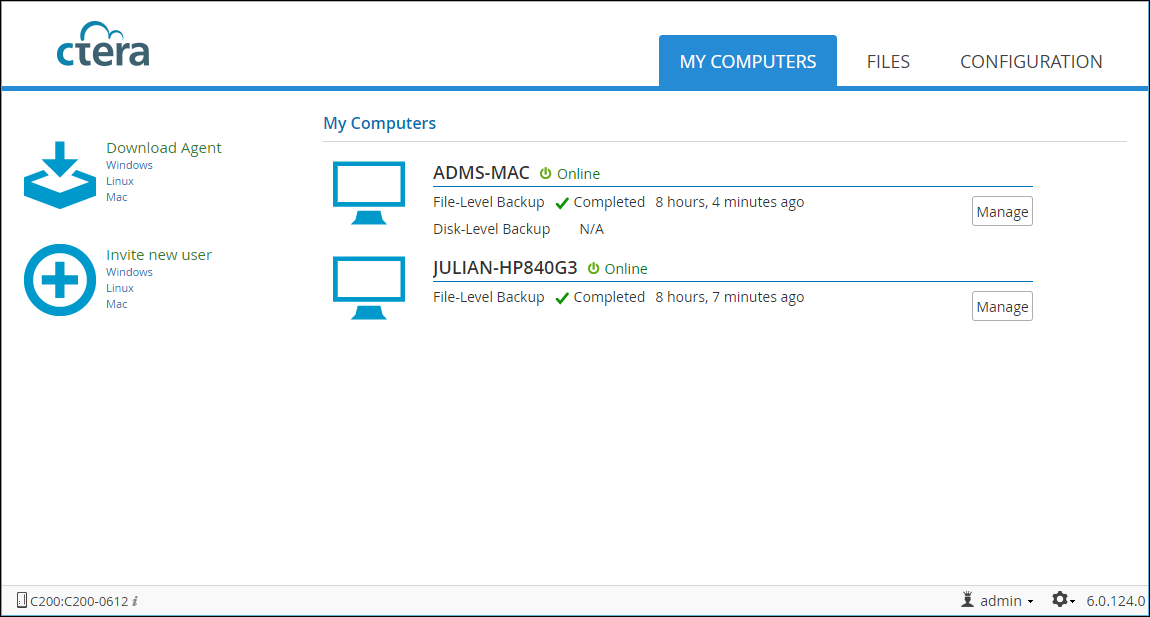
The tab includes the following:
FILES Tab
Use the FILES tab to manage folders and files on the gateway.
Note: You can also map to the folders and files from your file manager instead of using the FILES tab.
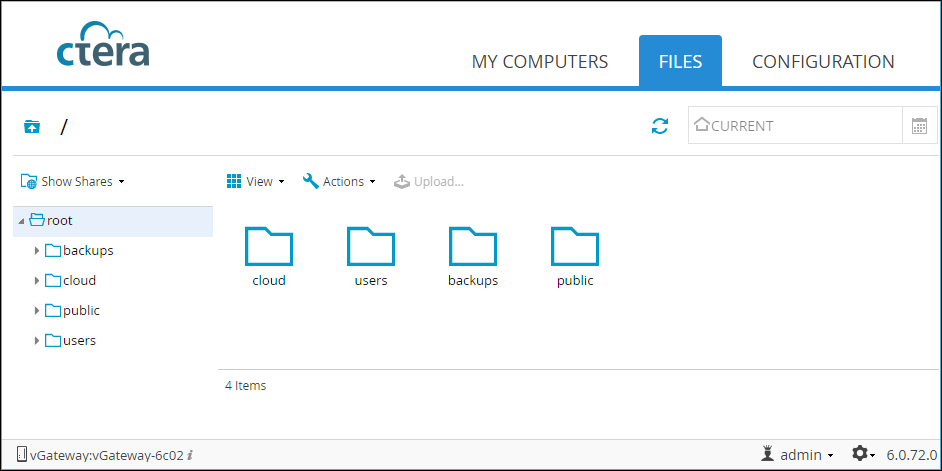
The tab includes the following:
Show Shares – Displays all network shares and the folders they contain.
Show Volumes – Displays both volumes and network shares. In this view, you can see and manage folders that are not included in any network share. Network sharing tasks and snapshots are not available in this view.
Details – The folders and files are displayed in a table with additional information such as the file type, size and last modification date.
Large Icons – The folders and files are displayed as large icons. Selecting an icon displays the information about the file or folder.
Dependent on the mode, other options are also available, such as the Invitation Manager, which shows you which invitations you have sent other users to view folders.
For more detailed information, see Using the FILES Tab.
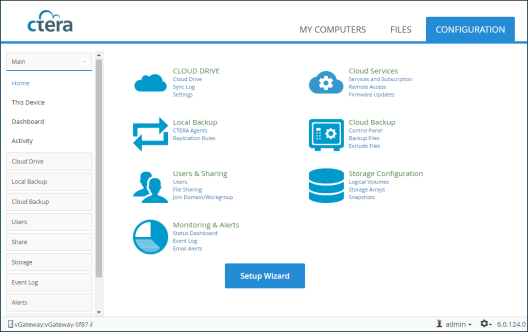
CONFIGURATION Tab
Use the CONFIGURATION tab to configure the gateway.

The tab includes the following: