Using the FILES Tab
The FILES tab enables you to manage the files stored on the gateway.
Note: You can also map to the folders and files from your file manager instead of using the FILES tab.
The FILES Tab Views
The Shares and Volumes views are supported:
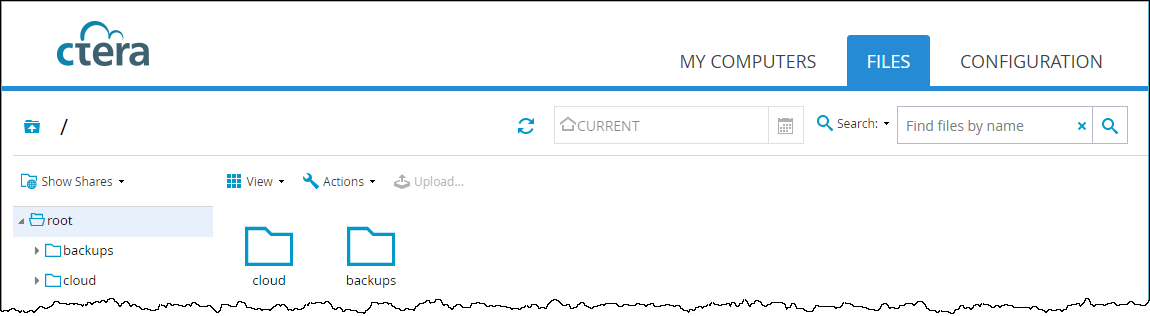
Show Shares – Displays all network shares and the folders they contain.
Show Volumes – Displays both volumes and network shares. In this view, you can see and manage folders that are not included in any network share. Network sharing tasks and snapshots are not available in this view.
Note: The Show Volumes view is available only to Administrators and Read Only Administrators groups.
To change the tree pane view, click the Show Shares/Show Volume option and then select the desired view.
Viewing Folder or File Details
You can view the folder structure and view or download the contents.
Note: The user interface can only display a maximum of 20000 folders and files. If you have more than 20000 folders and files, enable indexing and then search for specific groups of folders and files where each group is less than the 20000 limit. Enable indexing in the CONFIGURATION tab, under Storage > File Search. Once enabled, a search box is displayed in the FILES tab.
To view the folder structure:
1 In the FILES tab, in the Show Shares view, navigate to the folder or file.
The folder or file is displayed in the right pane.
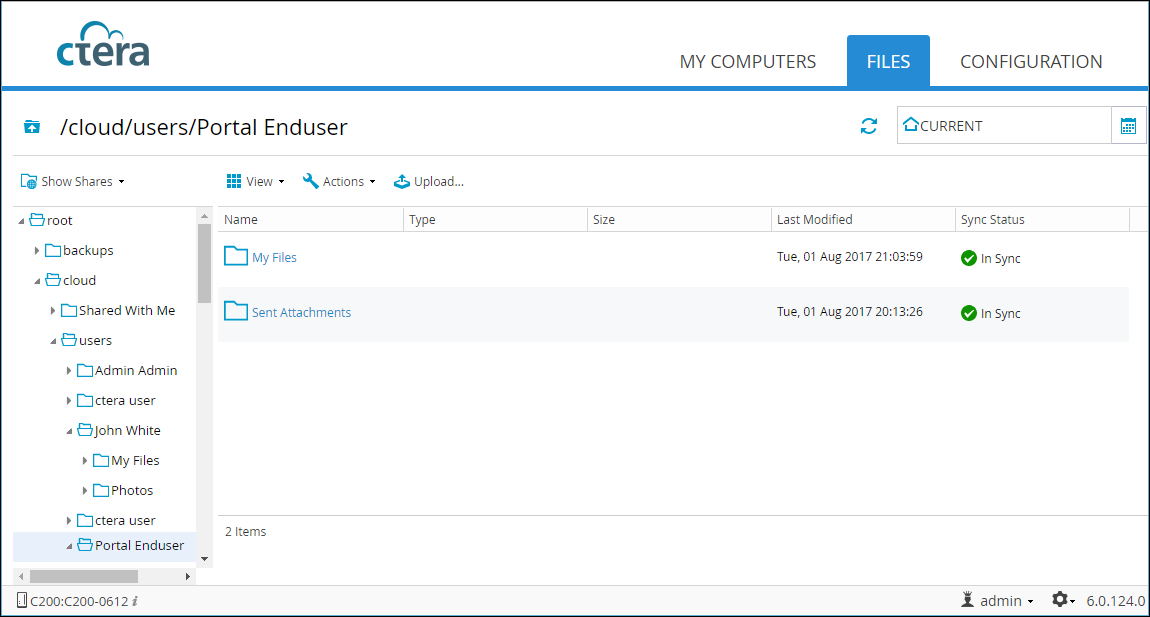
When viewing the cloud drive synchronization folder (root/cloud), each file is marked with an icon indicating its current synchronization status:
 – Folders or files that are in sync.
 – Files that are currently synchronizing.
 – Files that are stubs, when CACHING mode is configured.
In Details view, the icon is displayed in the Sync Status column. In Large view, the icon is displayed over the file or folder.
2 In the right pane, select the file or folder.
The selected item's details appear at the bottom of the right pane.
If the right pane is in Details view, the file and folder details are displayed in the table, as well.
To view the folder structure from a file manager:
where gateway_ip is the IP address of the gateway.
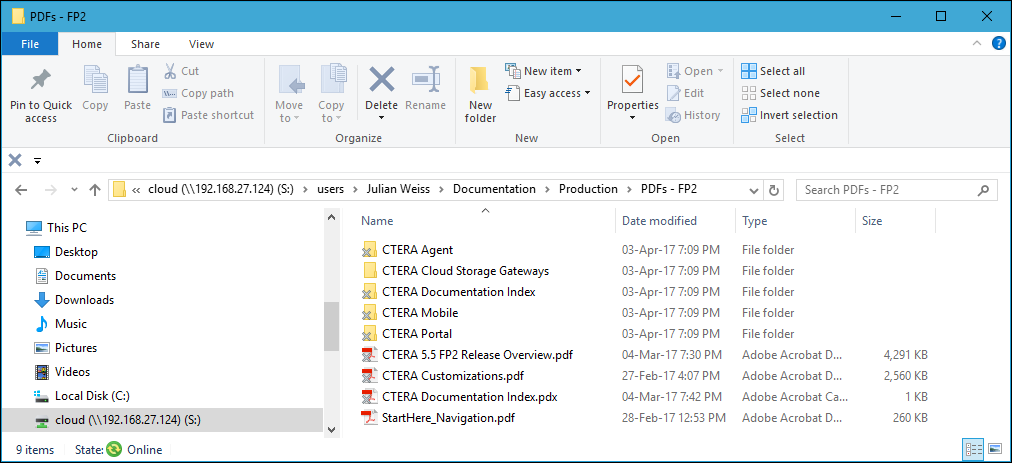
The above screenshot shows a Caching Gateway accessed from Windows File Explorer. When accessing the gateway from a Mac machine you need to following the procedure in Accessing a Caching Gateway From a Mac.
Note: The gateway user interface is case sensitive, so file and folder names with the same characters, but different cases, such as MYFOLDER, MyFolder and myfolder are different folders. When connecting to the gateway using Windows File Sharing, SMB protocol, which is not case-sensitive, these folders or files are treated as having the same name.
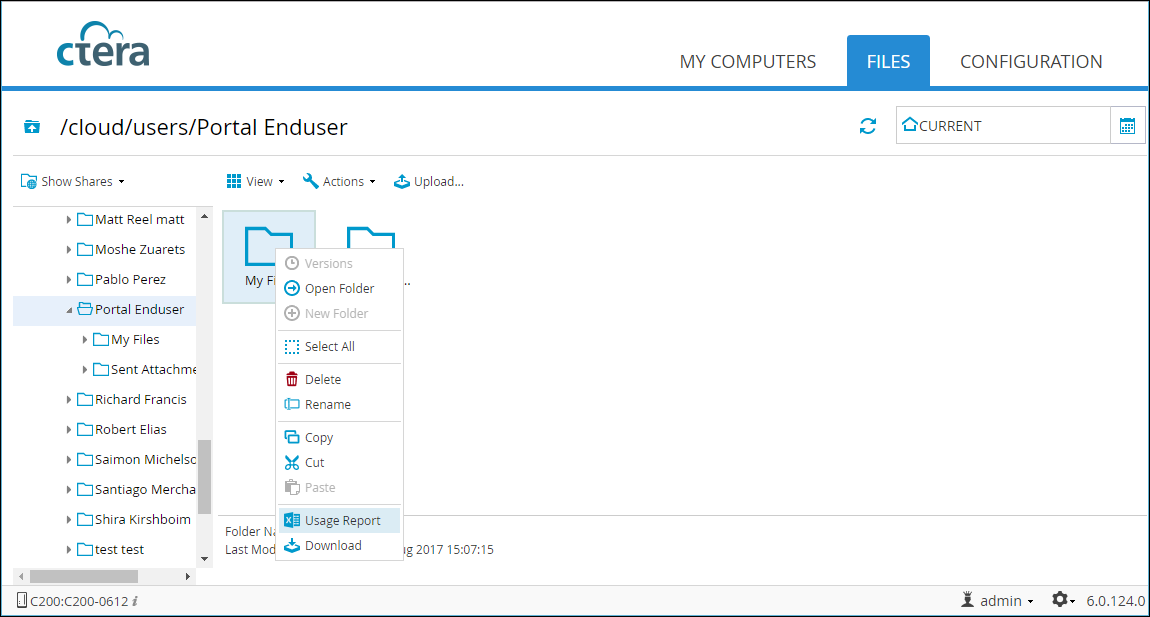
Creating Folder Usage Reports
You can create a folder usage report that displays detailed information about the folder. The report is saved to your computer as a comma separated values (*.csv) spreadsheet file.
To create a folder usage report:
1 In the FILES tab, in the Show Shares view, navigate to the folder.
2 In the right pane, right-click the folder and select Usage Report from the menu.
Note: You can also generate the report from the Actions option.
The generated usage report has the following columns:
At the end of the report, the total size and number of files is displayed.
Downloading Files and Folders
To download an individual file:
1 In the FILES tab, in the Show Shares view, navigate to the folder containing the file.
2 In the right pane right-click the file and select Download from the menu.
The file is downloaded to your computer.
Note: Double-clicking the file in Large view, or clicking the file in Details view either displays the file for viewing, for example, a PDF file, or downloads it.
To download multiple files or entire folders:
1 In the FILES tab, in the Show Shares view, navigate to the folder.
2 In the right pane, select the folders.
3 Right-click the file and select Download from the menu.
The selected content is downloaded to your computer as a .ZIP file.
Note: The right-click options are also available from the Actions option.
Uploading Files
To upload files:
1 In the FILES tab, in the Show Shares view, navigate to the folder.
2 In the right pane, click Upload.
The Upload files window is displayed.
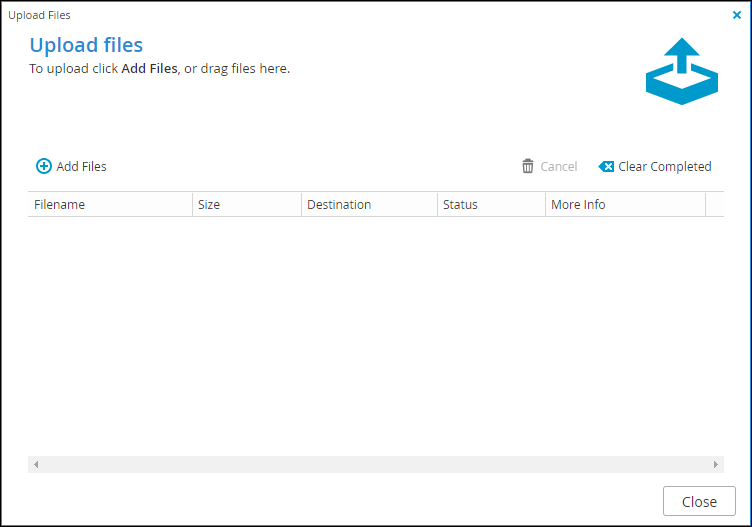
3 Click Add files and browse to the file.
Note: If you are using Chrome or FireFox as your Internet browser, you can drag-and-drop a file from your computer to the Upload files window.
4 If the file already exists, the following window is displayed.
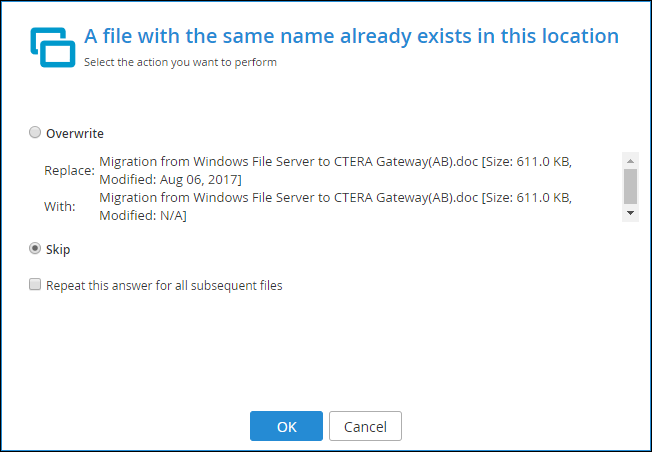
To overwrite the file with the file on your computer, select the Overwrite option and click OK. Click Close.
To clear the list of completed uploads:
To cancel an upload:
Creating New Folders
To create a new folder:
1 In the FILES tab, in the Show Shares view, navigate to the parent folder.
2 Right-click the folder and select New Folder from the menu.
The Choose a name window is displayed.
3 Enter a name for the new folder.
4 Click OK.
Note: The right-click options are also available from the Actions option.
Renaming Files and Folders
To rename a file or folder:
1 In the FILES tab, in the Show Shares view, navigate to the folder or file.
2 Right-click the folder or file and select Rename from the menu.
The Choose a name window is displayed.
3 Enter a new name.
4 Click OK.
Note: The right-click options are also available from the Actions option.
Copying and Moving Files and Folders
You can copy or move files and folders within the gateway to a different file location.
To copy or move files and folders:
1 In the FILES tab, in the Show Shares view, navigate to the folder or file.
2 To copy a file or folder, right-click the folder or file and select Copy from the menu.
3 To move a file or folder, right-click the folder or file and select Cut from the menu.
4 Navigate to the target folder, right-click in the folder and select Paste.
Note: Both standard Windows keyboard shortcuts, such as Ctrl-C to copy a file or folder and Ctrl-V to paste it, and Copy, Cut and Paste options from Actions can also be used.
Deleting Files and Folders
1 In the FILES tab, in the Show Shares view, navigate to the folder or file.
1 Right-click the file or folder to delete and click Delete.
2 Click Yes to confirm the delete.
Note: The right-click options are also available from the Actions option.
Searching for Files
To enable file searches in the gateway requires a file index. Building and maintaining this index can impact performance and the search mechanism is disabled by default.
To enable searching for files in the gateway:
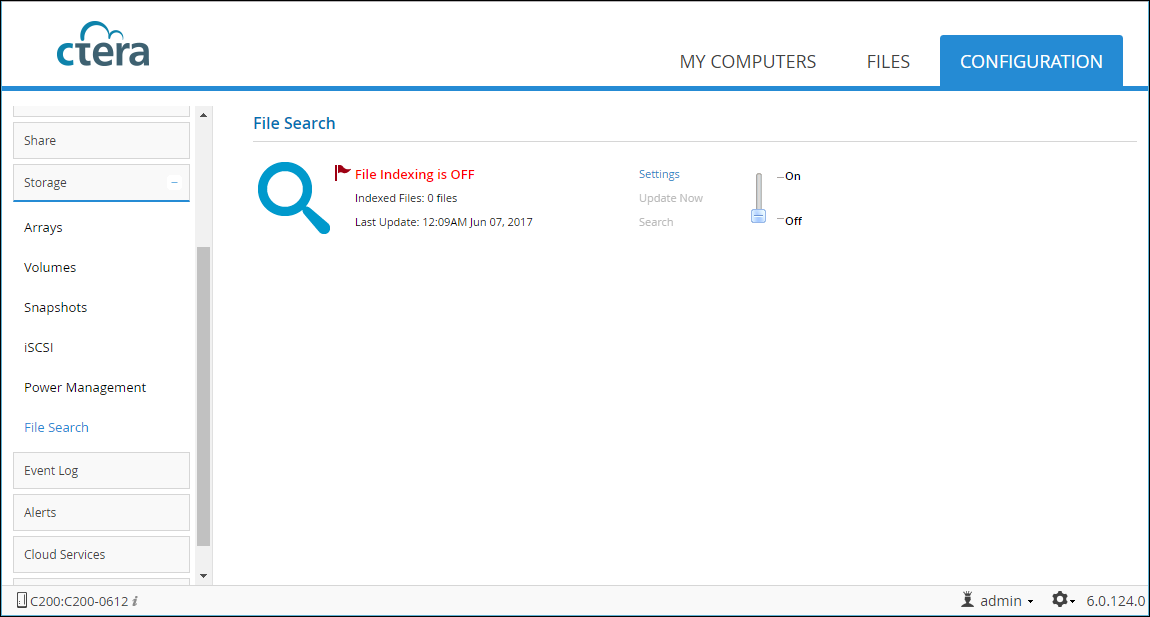
1 In the CONFIGURATION tab, select Storage > File Search in the navigation pane.
The File Search page is displayed.
Note: The Power Management option is only available with C200 and C400 gateways.
2 Slide the lever in the File Search page to On.
To disable file search, slide the lever in the File Search page to Off.
A Search box is displayed in the FILES tab.
When file search is enabled, the gateway updates the file search index according to a configured schedule. You can modify the schedule as needed.
To modify the file indexing schedule:
1 In the CONFIGURATION tab, select Storage > File Search in the navigation pane.
The File Search page is displayed.
2 Click Settings.
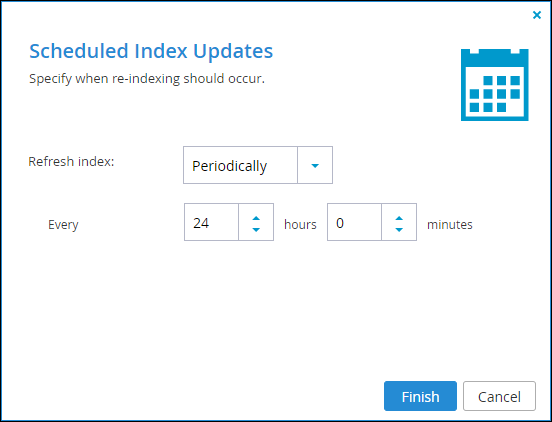
3 Choose the frequency at which the index is updated:
Manual – Scheduled index updates are disabled. See To manually start an index update:.
Hourly – The index is updated every specified number of hours. Specify the number of hours in the On the field.
Daily – The index is updated every day. Specify the time of day in the At field.
Weekly – The index is updated once a week. Specify the day of the week in the On field and the time in the At field.
Monthly – The index is updated once a month. Specify which day of the month in the On field and the time of day in the of the month at field.
Periodically – The index is updated periodically at the specified time. Specify the hour of the day in the Every field that is displayed.
4 Click Finish.
To manually start an index update:
1 In the CONFIGURATION tab, select Storage > File Search in the navigation pane.
The File Search page is displayed.
2 Click Update Now.
The file search index is updated. A progress bar tracks the indexing progress.
If file search is enabled, you can search for files by name in the FILE tab.
To search the gateway:
The search results are displayed.
Adding the Gateway as a Search Provider in Your Browser
You can add the gateway as a search provider in your browser. This enables you to search for files directly from your browser's search box.
To add the gateway as a search provider in a browser:
1 Set up file search as described in Searching for Files.
A Search box is displayed in the FILES tab.
2 In the FILES tab, click Search and select Add as search provider from the list.
The Add Search Engine window is displayed.
3 To start using the gateway immediately as a search provider, select the Start using it right away option.
If you do not select this option, the gateway will only be added as a search provider when you restart your browser.
4 Click Add.
The gateway is added to your browser's list of search providers.