Defining Network Shares
1 In the Configuration tab, select Share > Shares.
2 Click New Share.
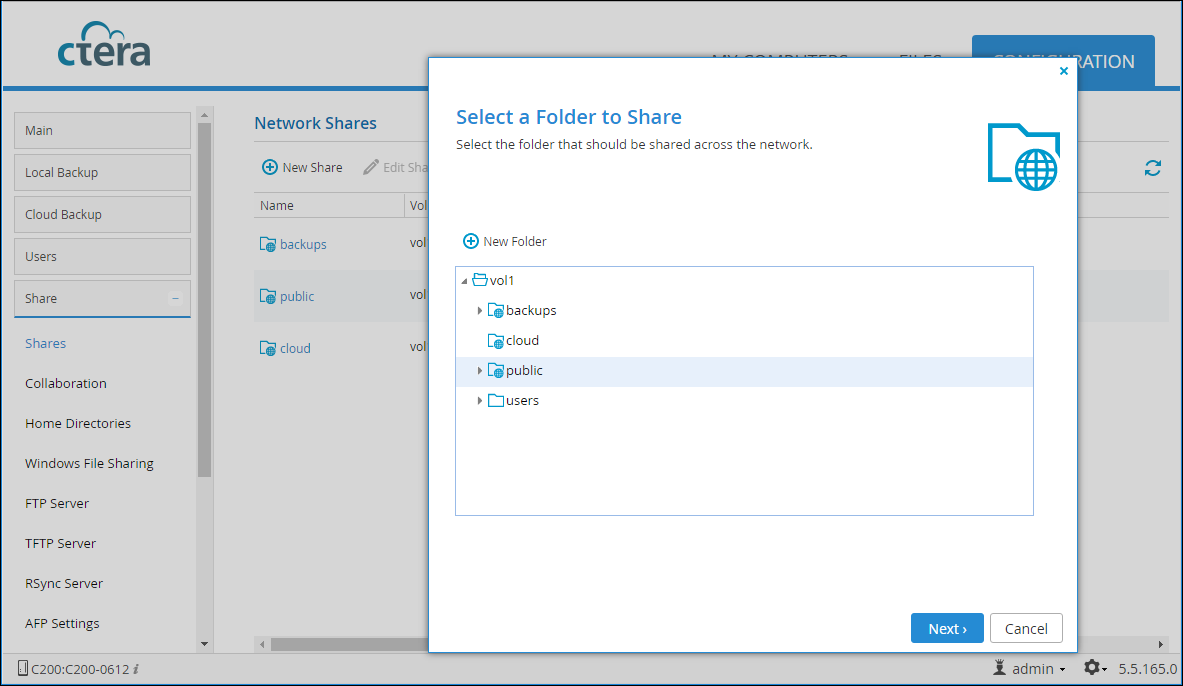
The Select a Folder to Share wizard opens, displaying the volumes and folders on the cloud storage gateway.
3 Select the volume, folder, or subfolder on which you want to define the share.
• You can drill down through the nodes to select a subfolder as a share. Shares of this type are known as nested shares. The permissions, protocols, and network file sharing settings are enforced for this type of share, and the settings of the parent share have no effect.
Note: When Sync Gateway is enabled, you cannot create a nested share that points to a folder under /cloud/.
Nested shares are not available for Cloud Backup. Instead, to back up the files, select them from the parent share.
• To create a new subfolder to select as a share, select the parent folder, click New Folder, and then assign the subfolder a name.
Note: Network shares must not overlap one another. For example, you cannot share both /a and /a/b.
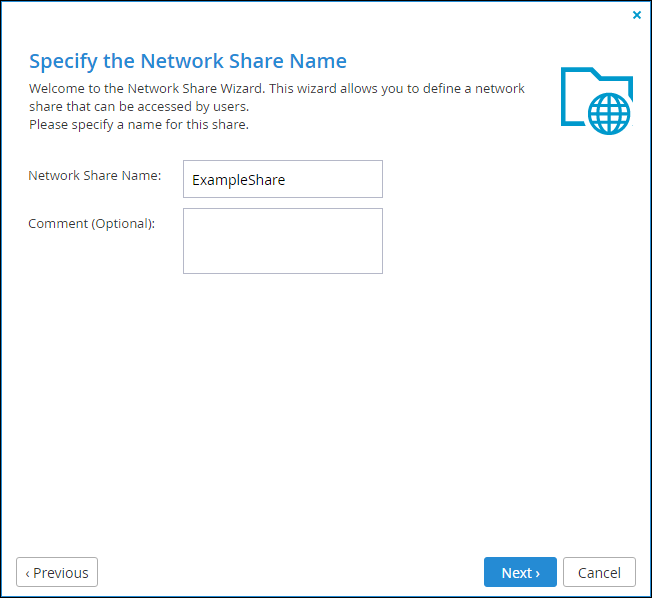
4 Click Next and then assign the network share a name.
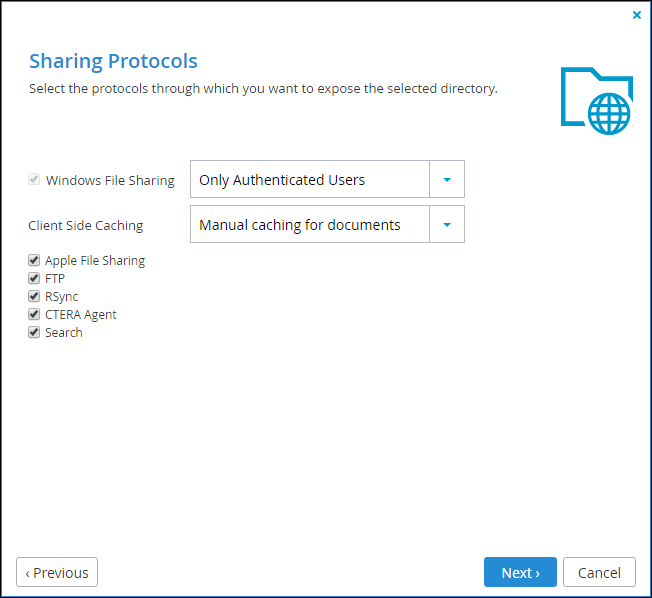
5 Click Next and choose through which sharing protocols to expose this share.
Windows File Sharing is checked by default and cannot be deselected. From the dropdown, select one of these access levels for the share:
• Only Authenticated Users. Users will be required to authenticate using their cloud storage gateway user name and password, in order to access the network share.
• Windows ACL Emulation Mode. The share will be a Windows ACL emulation mode share.
Users access the shared files and folders through standard Windows client computers; for example, using Windows Explorer through the SMB/CIFS access provided by the CTERA gateway.
Windows ACL Emulation Mode also allows you to block users from writing specific file types into the gateway share or gaining control of the content located on it. For more information, see
Windows File Sharing.
Client Side Caching. Server files are designated for off-line work so that a copy of the files is cached on the client computer and can be accessed when the client is off line in exactly the same way as if they were stored on the Windows file server.
Manual caching for documents – Users must cache files manually.
Automatic caching for documents – A copy of the files is cached automatically.
Disabled – The client computer cannot cache files locally and the updated copy must be retrieved from the file server.
6 Specify how you want to share the files.
Apple File Sharing – Mac users will be able to access files in this share via Apple File Sharing. To configure Apple File Sharing, go to Shares > AFP Settings.
FTP – Users will be able to access and download files on this share when they browse to the cloud storage gateway's FTP site. To configure the FTP server, go to Shares > FTP Server.
RSync – Users will be able to synchronize files in this share on their RSync clients or CTERA cloud storage gateways with the Cloud Storage Gateway, according to the RSync server configuration on the RSync Server page (Shares > RSync Server).
CTERA Agent – Users will be able to access files in this share from CTERA Agent.
Search – Users will be able to search for files in this share.
7 Click Next.
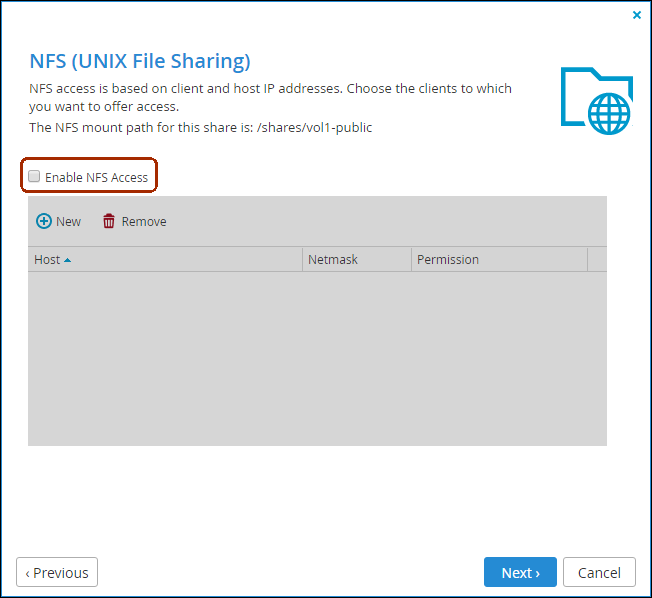
The NFS (UNIX File Sharing) window is displayed.
8 Check the Enable NFS Access option to enable NFS clients to access the share.
Either, click New to configure each client to which you want to grant access. A row is displayed in the table:
a Enter the client's IP address and netmask in the appropriate fields.
b Select the permitted level of access to the network share via NFS. Options are None, PreviewOnly, Read Only, or Read/Write.
Note: Preview Only permission prevents downloading, copying, or printing the file and content cannot be synchronized for offline access. For full details, refer to the CTERA Team Portal Administration Guide or CTERA Reseller Portal Administration Guide.
Or,
Click Remove and then select the desired client's IP address to remove the client from the list.
Note: The NFS mount path for the network share is specified at the top of the dialog box.
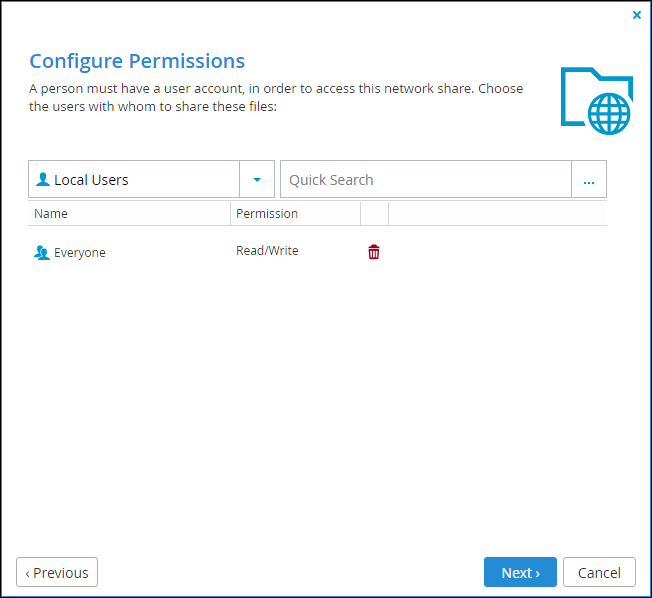
9 Click Next and set which users can access this network share:
a In the Local Users drop-down list, select one of the following:
Local Users – Search the users defined locally on the cloud storage gateway.
Domain domain Users – Search the users belonging to the domain called domain.
Local Groups – Search the user groups defined locally on the cloud storage gateway.
Domain domain Groups – Search the user groups belonging to the domain called domain.
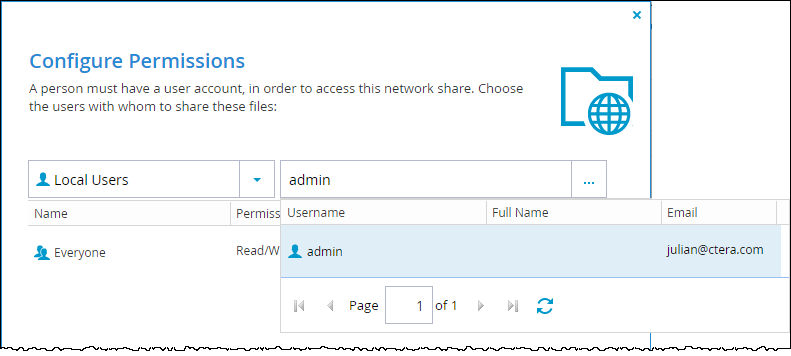
b In the Quick Search field, type a string that is displayed anywhere within the name of the user or user group you want to add, or click ... to list the users.
A table of users or user groups matching the search string is displayed.
c Select the desired user or user group in the table.
The user or user group is added to the list of users and user groups who should have access to the network share.
d For each user and user group, click in the Permission field, and then select the desired access level from the drop-down list.
10 Click Next and then Finish to complete the wizard.