Using Arrays to Combine Drives
Arrays combine multiple drives. There are several types of arrays. They can provide any and all of these benefits for C-Series gateways:
• Concatenated storage, so that you can allocate custom quotas from a larger pool of storage.
• Redundancy between drives, so that if a drive fails, your data is not lost.
• Faster performance.
Which Type of Array is Right for Me?
How many hard drives do you have installed in your cloud storage gateway? Do you want every drive to be redundant in case of failure, or do you want to use the maximum amount of storage space you can? And how does the array type affect the performance?
To simply combine the capacity from two or more drives, you can create a JBOD (Just a Bunch of Disks) array. This type of array lets you use a set of drives like one drive. For example, one 500 GB drive and one 950 GB drive in such an array would act as a 1450 GB drive. You can then create volumes of any size on the array adding up to a total of 1450 GB.
If you have two or more drives and you want to maximize your drive speed, you can create a RAID0 array. In RAID0, data is striped across all the drives in the array. A RAIDO array acts as one drive with the combined capacity of all the drives in the array and faster performance.
For full redundancy, you can create a RAID1 array from two or more disks. RAID1 mirrors (duplicates) all data across all drives in the array. Data is only lost if all drives in the array fail. Since the exact same data must be written on each disk in the array, the capacity of a RAID1 is the capacity of the smallest drive in the array.
If you have three or more drives, you can have maximized speed as well as redundancy with a RAID5 array. RAID5 uses striping and distributed parity. Data is striped onto the drives and parity information is distributed across all the disks. If one drive fails, the data can be reconstructed from the parity information. The capacity of a RAID5 array is (n-1)*s, where n is the number of drives and s is the size of the smallest drive.
If you have more than three drives, you can create a RAID6 array, which uses dual parity with striping. That means maximized speed and the data is safe even if two drives fail. The capacity of a RAID6 array is (n-2)*s, where n is the number of drives and s is the size of the smallest drive.
What is Striping?
In striping, data is chopped up into data blocks, smaller pieces of data, and blocks are written to all the drives in the array instead of all the data being written to one drive. This means the writing is done in parallel and the performance is increased. When the data is read from the drives, for restore, backup or sync operations, the performance is also faster.
Which Arrays Does My Cloud Storage Gateway Support?
• C200: JBOD, RAID0, RAID1
• C400: JBOD, RAID0, RAID1, RAID5, RAID6
• C800, C800+: JBOD, RAID0, RAID1, RAID5, RAID6
Can I hot swap drives from an array?
RAID1, 5, and 6 support hot swapping, in which drives are replaced without turning off the cloud storage gateway. The array remains accessible throughout the hot swap procedure. For further information, see
Hot Swapping a Drive in a RAID1, 5, or 6 Array.
Creating Arrays
To create an array:
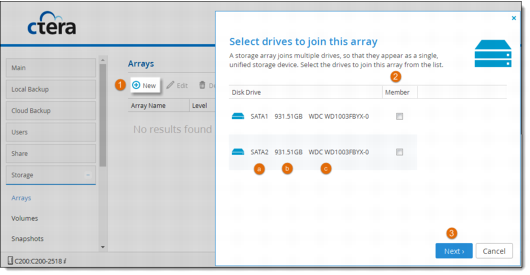
1 In the Configuration tab, select Storage > Arrays, and then click New.
A wizard shows you all drives available and asks you to select drives to join the new array.
For every drive, you can see:
a The type
b The capacity in GB
c The model
2 Check the Member box for each drive you want to include in the array.
Note: CTERA does not recommend creating an array using USB drives. An array cannot contain both SATA and USB drives.
You cannot include a hard drive that does not support SCT Error Recovery Control in the array.
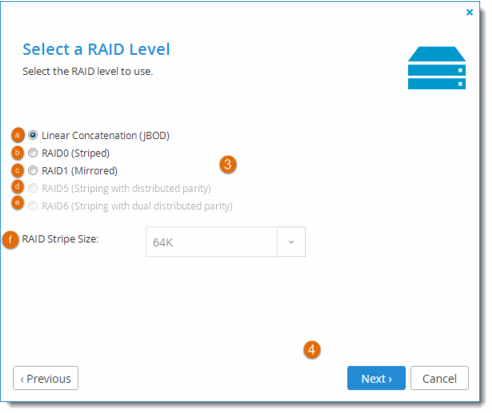
3 Click Next and then select the type of array you want to create.
a Linear Concatenation (JBOD). A simple unifying of all the drives with the combined capacity of all the drives.
b RAID0 (Striped). Combines the capacity of the drives and increases the read and write speed using striping.
c RAID1 (Mirrored). Duplicates all data to all the drives. Full redundancy.
d RAID5 (Striping with distributed parity). Striping for faster performance, combined capacity of (n-1)*s, where n is the number of drives and s is the size of the smallest drive. If any one drive fails, data is not lost.
e RAID6 (Striping with dual parity). Striping for faster performance, combined capacity of (n-2)*s, where n is the number of drives and s is the size of the smallest drive. If any two drives fail, data is not lost.
f RAID Stripe Size. For RAID0, RAID5 or RAID6, the size of blocks that data is divided into when it is written to the array and distributed across the drives. Reading and writing large data files sequentially generally benefits from a large stripe size. Small random reads and writes generally benefit from a smaller stripe size. The default value is 64 K.
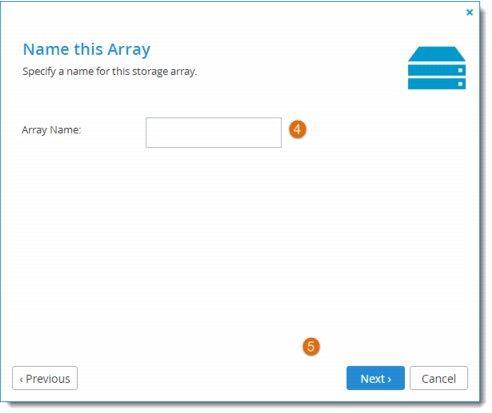
4 Click Next and then enter a name for the array.
5 Click Next.
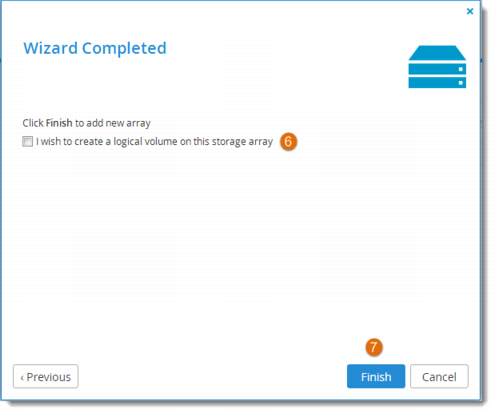
6 To immediately create a volume on the array, select the I wish to create a logical volume on this storage array check box.
7 Click Finish.
If you checked the box in step
6, you can proceed to create a volume, as described in
Creating Volumes.
Modifying Arrays
To make any changes to an array, click its name in the Arrays page and then proceed through the wizard, as for creating a new array.
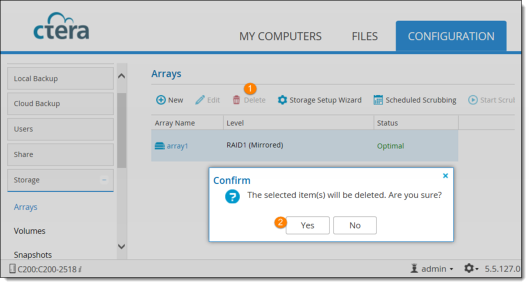
Deleting Arrays
Warning: Deleting an array will result in the loss of all existing data on the array.
To delete an array, select the array, and then click Delete. Click Yes to confirm.
Enlarging a RAID1 Array
You can use hot swapping to enlarge a RAID1 array. For example, assume you have two hard drives, HDD1 and HDD2, in a RAID1 mirroring configuration and in optimal state. The capacity of HDD1 and HDD2 is 500GB each, meaning the array size is 500GB. You can enlarge the array to 1TB as follows:
2 Wait until the array's status is optimal.
4 Wait until the array's status is optimal.
The array will now be 1TB in size.
You can now enlarge volumes on the array to fill the available space, or add new volumes.
After expanding an array, the added disk space can be used to increase volume sizes, as described in
Creating Volumes.