Creating and Editing Volumes
To create or edit a volume:
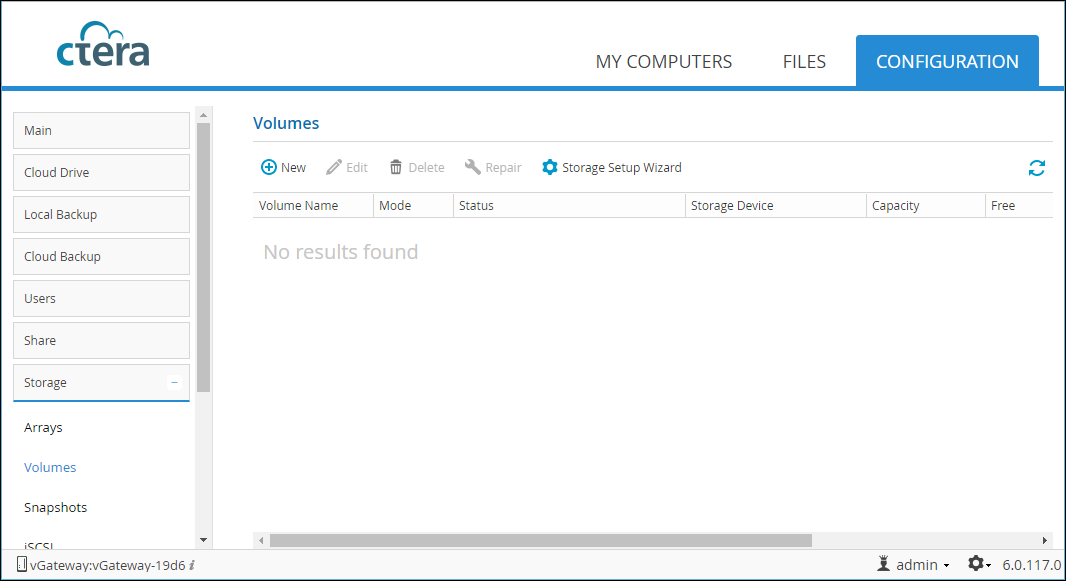
1 In the CONFIGURATION tab, select Storage > Volumes in the navigation pane.
The Volumes page is displayed. If a volume was not created when the gateway was installed, the page is empty.
2 Click New or select the volume to edit and click Edit.
The Specify Volume Details page is displayed.
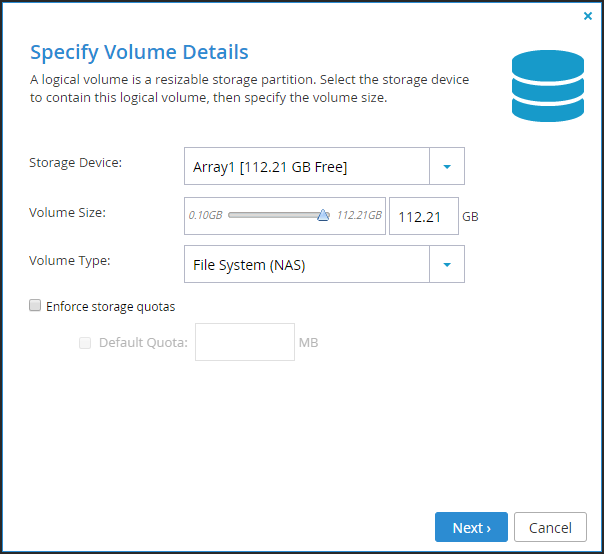
Storage Device – Either an array on which to create the volume or a drive that is not part of an array. The size of each array and drive is shown in brackets.
Volume Size – You can either drag the slider or enter a number of GB. If you're modifying a volume and snapshots are enabled, you cannot shrink the size.
Note: When you want the gateway configured in CACHING mode, CTERA recommends that the volume is as large as possible.
Volume Type – Either File System (NAS) or Raw Volume (SAN). NAS volumes can be accessed using all the file sharing protocols supported by the gateway. SAN volumes can be accessed only by iSCSI. If you create a SAN volume, you will need to create an iSCSI target to enable access to the volume. Once the volume is created, you cannot change the volume type.
If you select NAS volumes as the volume type, the File System field is displayed.
For gateways running versions prior to version 6.0.696.26:
File System – Select the file system.
NEXT3 supports snapshots for the volume. The volume is installed with the NEXT3 file system, and snapshots of the volume are automatically taken before each cloud backup or outgoing synchronization rule is performed. For more information, see Volume Snapshots.
You must define the volume as XFS when configured for CACHING mode. XFS volumes are limited by CTERA to 64TB. Further limitations apply through the physical disk sizes that can be incorporated in the gateways. The Virtual Gateway’s size is limited by the underlying disks and the Virtual Gateway license.
Enforce storage quotas – Check to limit the amount of storage space allocated to each non-administrative volume user. Each non-administrative user can then be allocated a specific storage space quota, as described in Allocating Disk Quotas to Users. If quotas are not enabled, then each user is able to use unlimited space on this volume.
Default Quotas – The default storage quota in MB, which is allocated to each user.
3 Click Next and choose whether you want to encrypt the volume.
Make this volume encrypted – Encrypt the contents of this volume using a passphrase. This option is disabled when editing a volume.
Passphrase –The passphrase to use to access the volume.
Retype Passphrase –The passphrase retype to confirm it.
Volume encryption is supported both for standalone volumes and volumes residing in RAID arrays. The encryption method employed is the Advanced Encryption Standard (AES-256 CBC ESSIV). Enabling volume encryption may reduce performance.
Note: It is important to keep the passphrase in a safe place, as there is no way of retrieving it if you lose it. If you reset your gateway to its default settings, you cannot access the volume without this passphrase.
4 Click Next and name the volume.

5 Click Next and then click Finish.
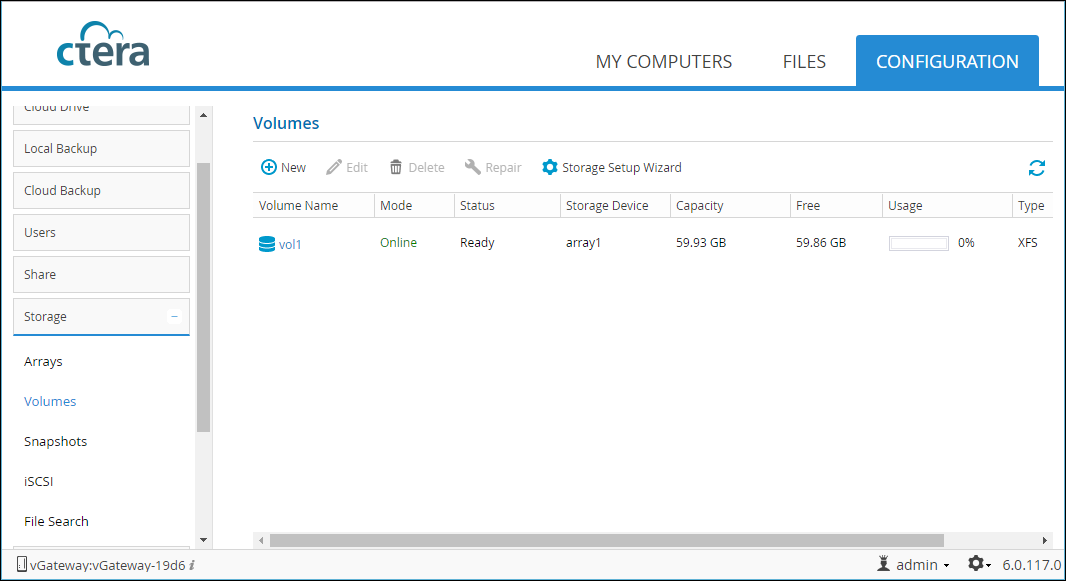
The volume you created is displayed in the Volumes page.
Enlarging a Volume
When the volume defined in the gateway does not use all the available storage, you can enlarge the volume size.
Note: When the volume defined in the gateway uses all the available storage, see CTERA Edge Filer (Gateway) Installation and Maintenance Guide for your platform.
To enlarge a volume:
1 Log on to the gateway as an administrator.
2 In the CONFIGURATION tab, select Storage > Volumes in the navigation pane.
The Volumes page is displayed.
3 Select the volume and click Edit.
The Specify Volume Details screen is displayed.
4 Move the Volume Size slider to increase the volume storage.
Note: The XFS volume size cannot be decreased.