Managing Arrays
Note: The H-Series and X-Series of Edge Filers are supplied with arrays that are preconfigured. These arrays cannot be changed.
To create an array:
1 In the CONFIGURATION tab, select Storage > Arrays in the navigation pane, and click New.
The Select drives to join this array wizard is displayed, which shows you all drives available and asks you to select drives to join the new array.
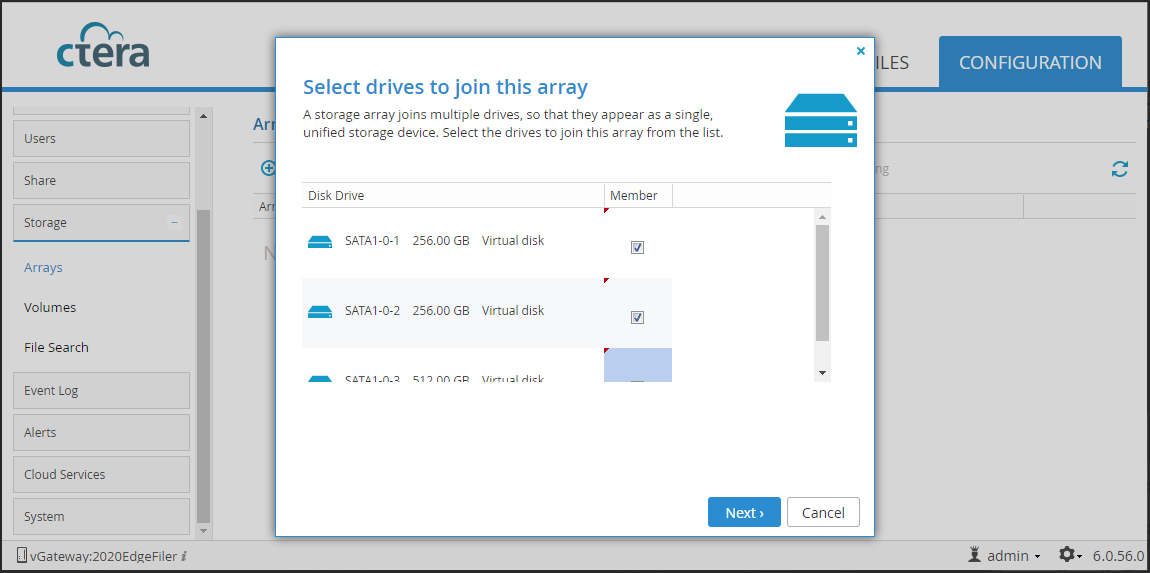
For every drive, you can see the type of the drive and the capacity in GB.
2 Check the Member box for each drive you want to include in the array.
Note: CTERA does not recommend creating an array using USB drives even though for a C-Series gateway an array cannot contain both SATA and USB drives.
You cannot include a hard drive that does not support SCT Error Recovery Control in the array.
3 Click Next and then select the type of array you want to create.
Linear Concatenation (JBOD) – A simple unifying of all the drives with the combined capacity of all the drives.
RAID0 (Striped) – Combines the capacity of the drives and increases the read and write speed using striping.
For a C-series Edge Filer:
RAID1 (Mirrored) – Duplicates all data to all the drives. Full redundancy.
RAID5 (Striping with distributed parity) – Striping for faster performance, combined capacity of (n-1)*s, where n is the number of drives and s is the size of the smallest drive. If any one drive fails, data is not lost.
RAID6 (Striping with dual parity) – Striping for faster performance, combined capacity of (n-2)*s, where n is the number of drives and s is the size of the smallest drive. If any two drives fail, data is not lost.
4 Specify the RAID Stripe Size.
For RAID0, RAID5 or RAID6, the size of blocks that data is divided into when it is written to the array and distributed across the drives. Reading and writing large data files sequentially generally benefits from a large stripe size. Small random reads and writes generally benefit from a smaller stripe size. The default value is 64 K.
5 Click Next and enter a name for the array.
6 Click Next.
7 To immediately create a volume on the array, select the I wish to create a logical volume on this storage array check box.
8 Click Finish.
If you checked the box in step 7, you can proceed to create a volume. For details, see Creating and Editing Volumes.
Modifying and Expanding Arrays
To make any changes to an array, for example, expanding the array after adding new disks, click its name in the Arrays page and then proceed through the wizard, as for creating a new array. For details refer to the CTERA Edge Filer (Gateway) Installation and Maintenance Guide for your platform.
After expanding an array, the added disk space can be used to increase volume sizes. For details, see Enlarging a Volume.
Deleting Arrays
Warning: Deleting an array will result in the loss of all existing data on the array.
To delete an array, select the array, and then click Delete. Click Yes to confirm.
Data Scrubbing
Note: Data scrubbing only applies to RAID5 or RAID6 arrays.
Gateways can perform RAID data scrubbing. During data scrubbing, the gateway reads all the disks in a RAID array and checks for defective blocks, thus reducing the likelihood of silent data corruption and data loss due to bit errors.
By default, automatic scrubbing is performed on a weekly basis for all defined RAID arrays. It can also be run manually for specific arrays.
To schedule data scrubbing:
1 In the CONFIGURATION tab, select Storage > Arrays in the navigation pane.
The Arrays page is displayed.
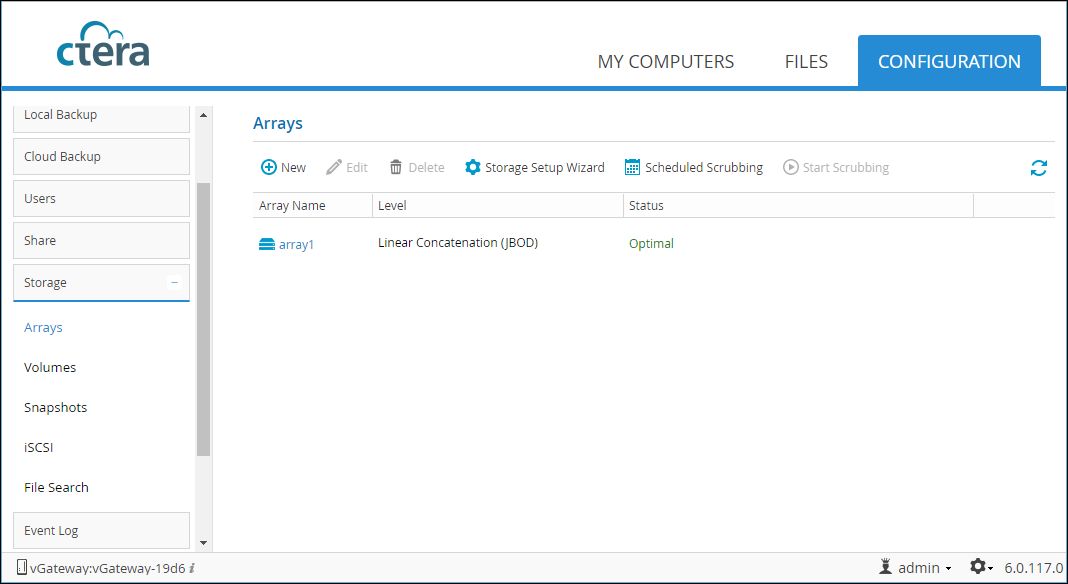
2 Click Scheduled Scrubbing.
The Data Scrubbing window is displayed.
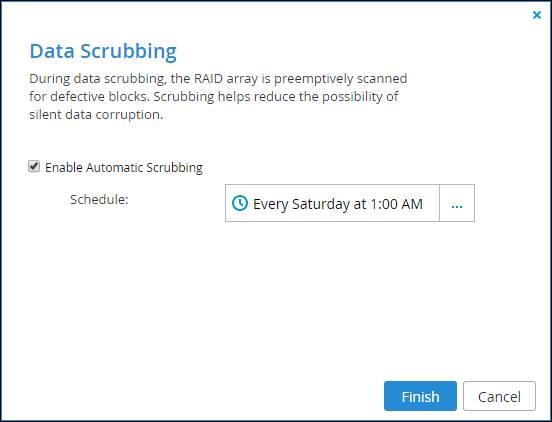
3 Check Enable Automatic Scrubbing.
4 Click in the Schedule field to change the schedule.
The Scheduled Scrubbing window is displayed.

5 Select the hour at which data scrubbing starts and the days on which data scrubbing is performed, or Every Day for data scrubbing to be performed every day.
6 Click OK to close the scheduling dialog.
7 Click Finish.
To manually start data scrubbing:
1 In the CONFIGURATION tab, select Storage > Arrays in the navigation pane.
The Arrays page is displayed.
2 Select the array you want to scrub.
3 Click Start Scrubbing.
A success message is displayed, informing you that data scrubbing has started.
4 Click OK.
To cancel data scrubbing: